Product was successfully added to cart Product was successfully added to wishlist Your bid has been placed
{{PopupAddToCartVueModal.ProductName}}
There are {{PopupAddToCartVueModal.TotalItems}} in your cart. There are {{PopupAddToCartVueModal.TotalItems}} in your wishlist. You have {{PopupAddToCartVueModal.TotalItems}} ongoing auctions
Categories
This page describes how to manage categories in your GrandNode store. You can add unlimited categories and sub-categories. From this page you can backup your categories to Excel with Export feature and import categories.
List of content:
- How to add category
- Show category
- Flags on categories
- SEO
- Products
- Discounts
- Access Control List
- Activity log
- Icons
- Show featured products on homepage
How to add category
1. Click Add new button in the top of screen.
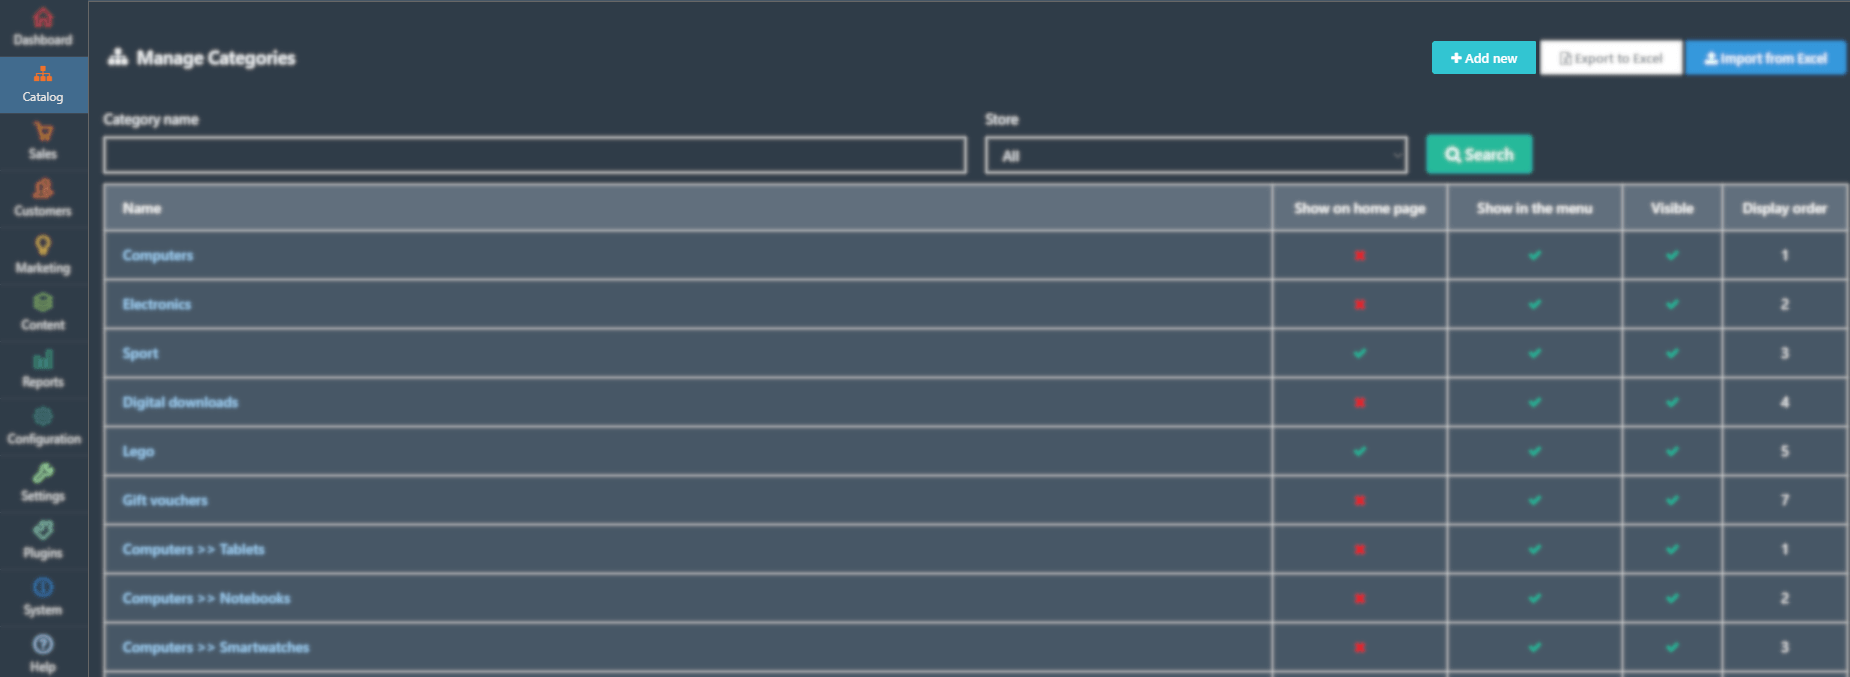
2. Fill following fields:
Name - Name of your category
Description - Full description of your category
Picture - you can add here image of your category
Parent category - If you are creating sub category you need to set here parent category.
Price ranges - You can enable price filtering to your customers. Enter here price ranges, for example 0-100;101-500;501-; (where 501 - ; means more than 501)
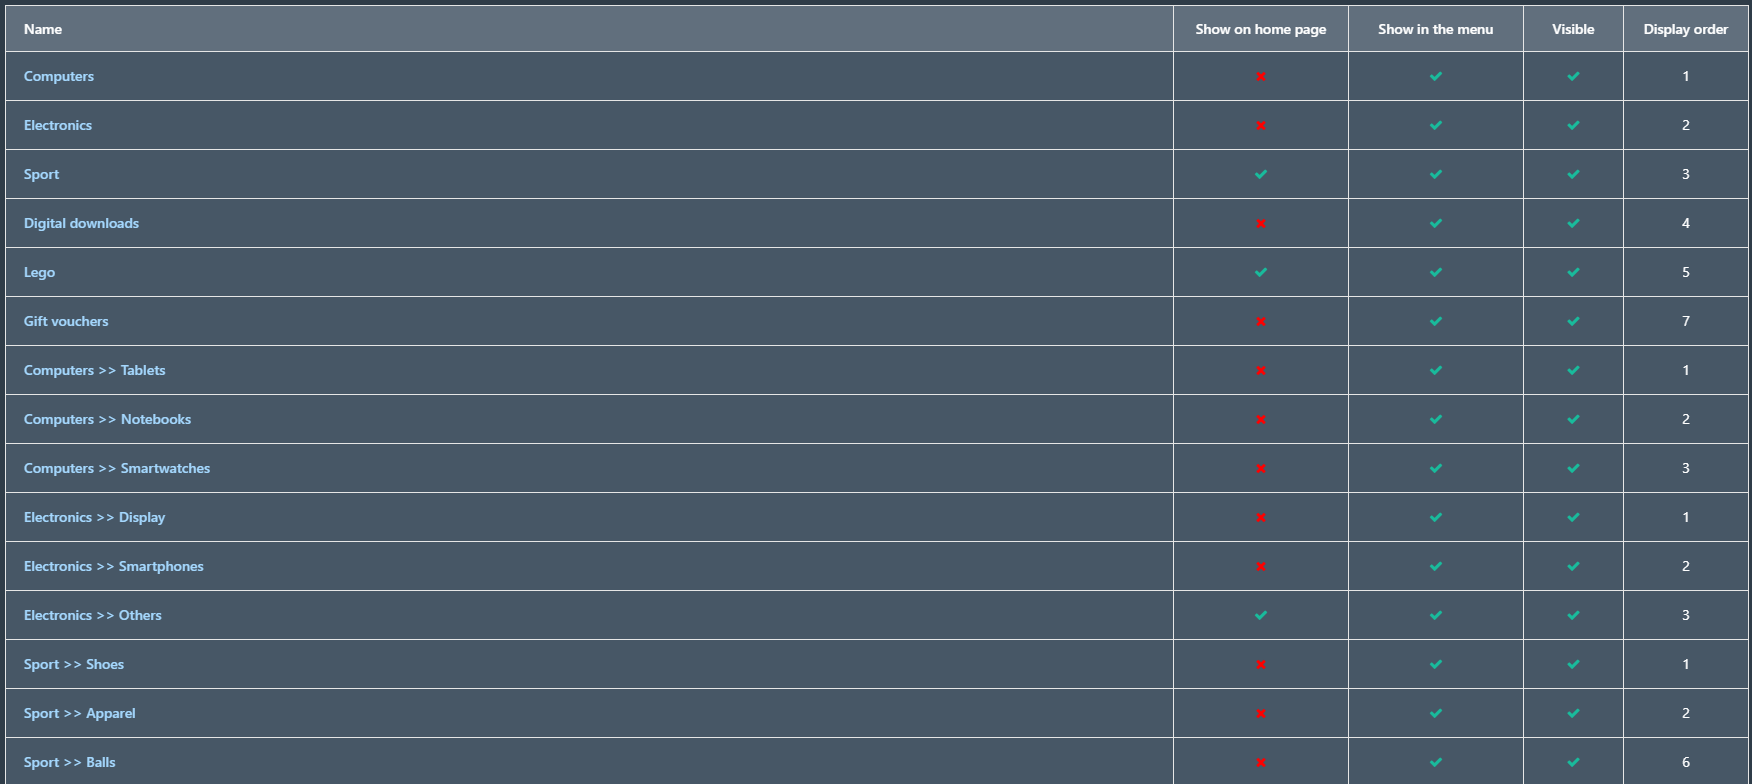
Show on home page - Check when you want to show this category on home page of your store
Show featured products on homepage - Check when you want to show featured prodcuts on homepage in category box (Example below)
Include in top menu - Check when you want to include this category in top menu of your GrandNode store
Show category on search box - Check if you want to show category in search box
Allow customers to select page size - Check if your customers are allowed to select page size of category page
Page Size options - Enter how many products should be visible on category page
Published - Check if you want to publish this category
Display order - Display order of your category
Flag - Enter the flag text, which will appear on menu item
Flag style - Provide the CSS class for the flag
Icon - Provide the CSS class for the icon
Hide category on category page (subcategory) - Check if you want to hide category on subcategory list
Show category on search box
If you check this field, you will be able to search for products in that category directly from search box. An example is shown below:

Flags on categories
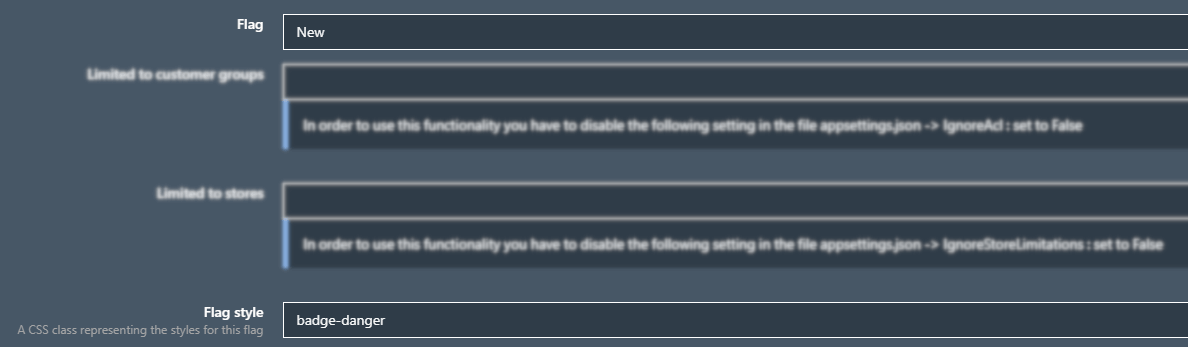
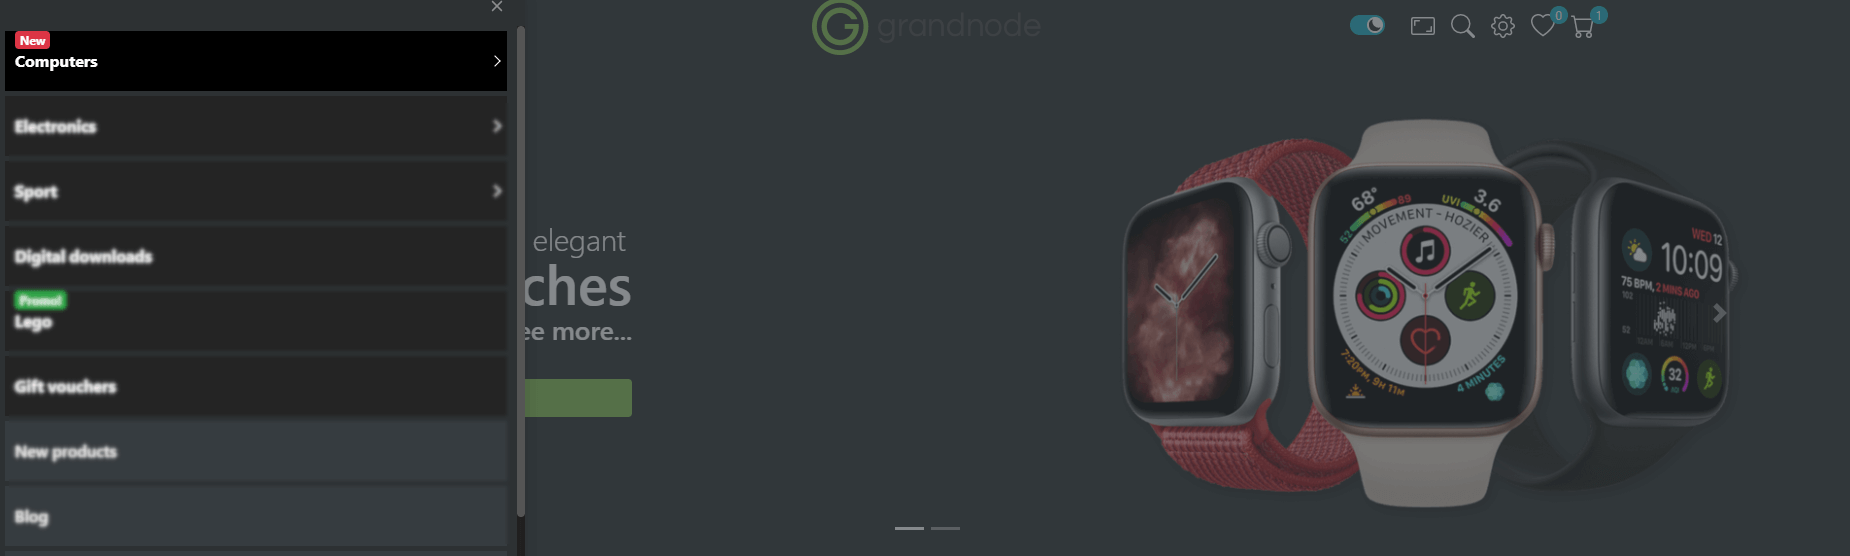
You are able also to highlight specified categories. To achieve that, you need to create a flags (ribbons) in the admin panel. Just use the Flag and Flag style fields. In the Flag field, provide the text which will appear on the ribbon. In the flag style field, provide the CSS class for the flag. You can use Bootstrap classess like badge-danger.
Example of flag is prestented on our demo:
SEO
Meta keywords, description, title - You can enter here specified keywords, description and title for only that category page, site keywords, description and title will be replaced.
Search engine friendly page name - enter URL which will be used by search engines. If you leave it empty it will be named as another category. If you enter my-category-page your URL to that product will be http://yourstore.com/my-category-page
Products
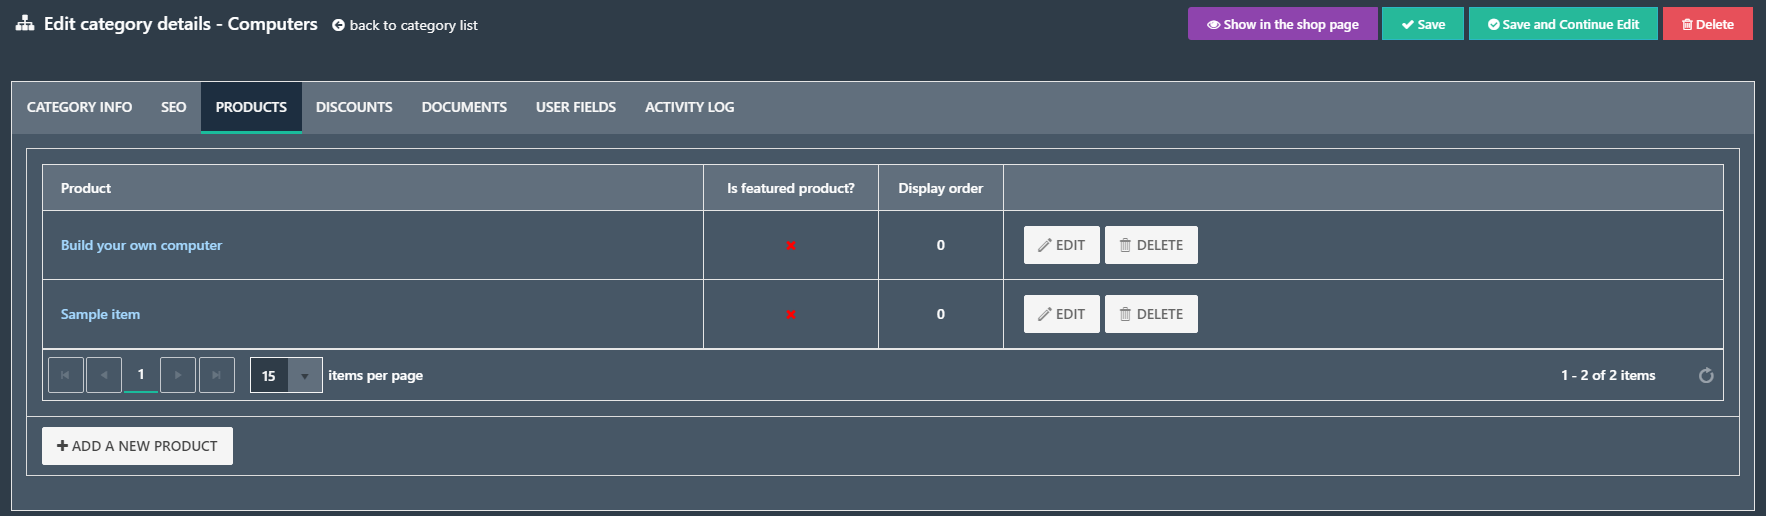
Choose products which will be assigned to your new category. You can choose unlimited products.
IMPORTANT: Please note that display order visible in this part is used only as a helper in sorting products on list. If you want to change the display order of products on category page, please go to "Products" -> Additional info.
Discounts
A place where you can assign specified discounts to your new category.
Access Control List, Stores
Access Control List (ACL) - You can specify here which customer role will see this category.
Stores - You can specify here to which store this category will be limited.
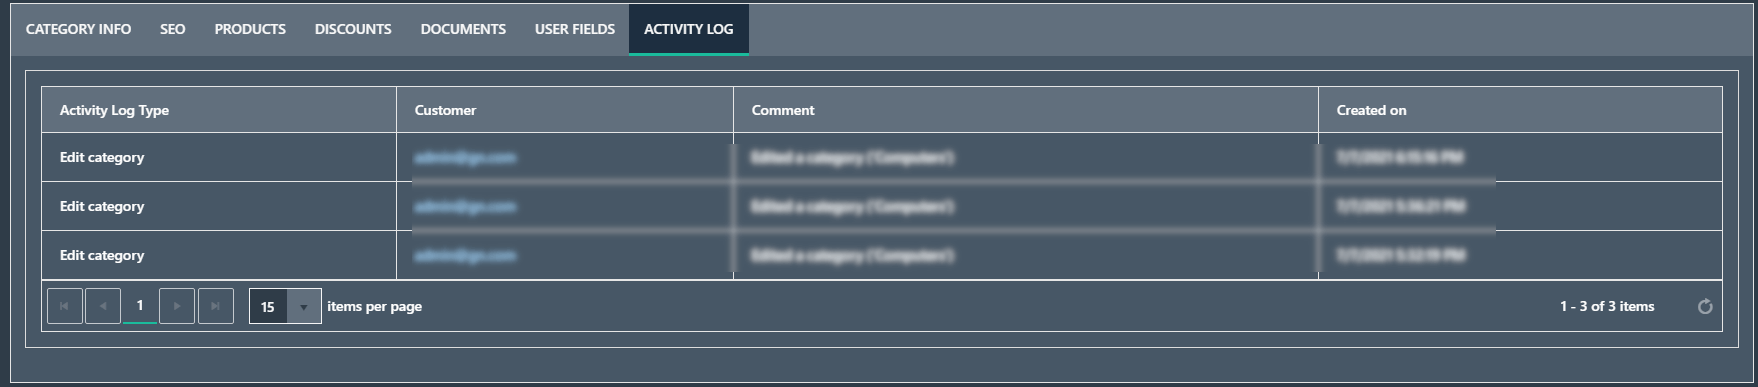
Activity Log
To track activity log you need to activate this type of activity in administrator dashboard >> Settings >> Activity Log Types and check actions connected with managing categories.
Usefull tool to track bechaviour of each customer/staff.
Icons
Feature available from GrandNode 4.30. Open your style.css file, create a new class with icon and provide that class in "Icon" field during the category creation.
Show featured products on homepage
If you check the "Show featured products on homepage" and you will choose feature products on category, you will see them on homepage in special grid.
