Product was successfully added to cart Product was successfully added to wishlist Your bid has been placed
{{PopupAddToCartVueModal.ProductName}}
There are {{PopupAddToCartVueModal.TotalItems}} in your cart. There are {{PopupAddToCartVueModal.TotalItems}} in your wishlist. You have {{PopupAddToCartVueModal.TotalItems}} ongoing auctions
Google External Authentication
Creating Google App
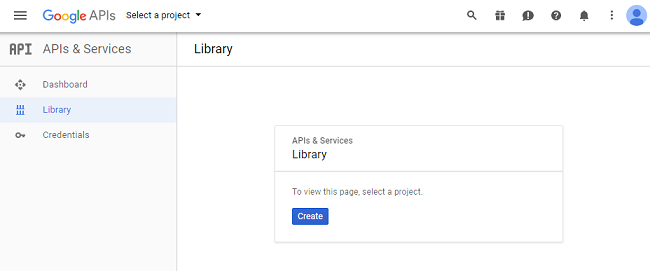
We need to create a new Google app on Google API console. Navigate to https://console.developers.google.com/projectselector/apis/library and log in using your Google account. If you do not have a Google account, you need to create one. You cannot proceed without a Google account. Once you have logged in, you will be redirected to API Manager Library page, similar to the one shown below.

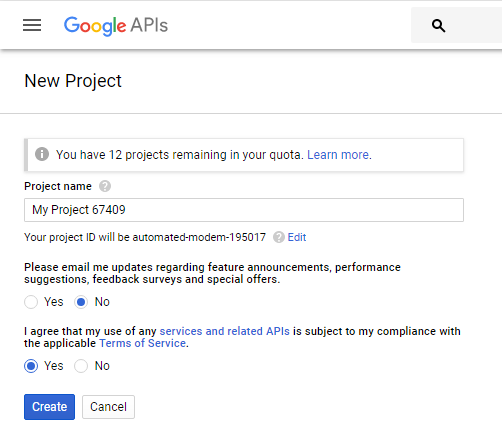
Click on Create button to move to “New Project” page where you need to create a new project. The “Project name” field will be populated automatically with a default name provided by Google. If you want then you can override that with your own custom name. For this tutorial we will be using the default name. Accept the terms of service and then click on Create button.

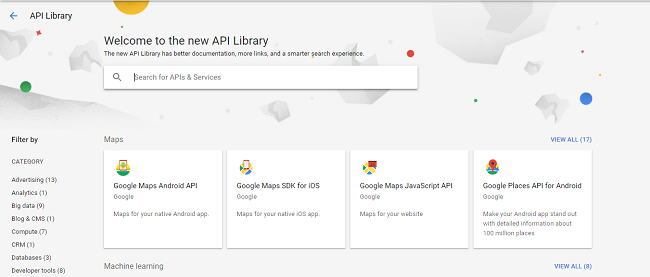
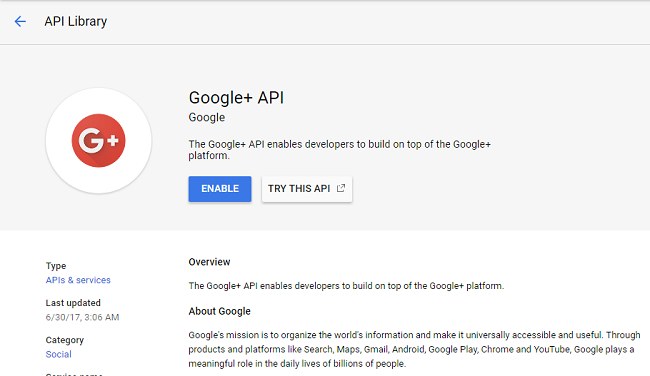
Your project will be created successfully and you will be redirected to API Library page similar to one shown below.

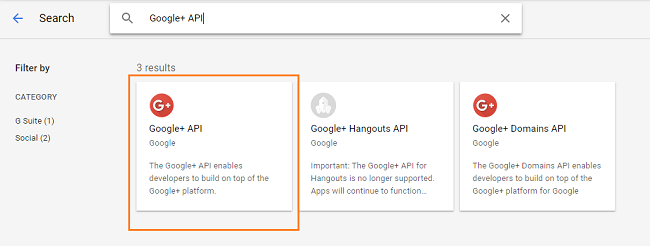
Search for Google+ API in the search bar and select Google+ API from the search results. Refer to the below image

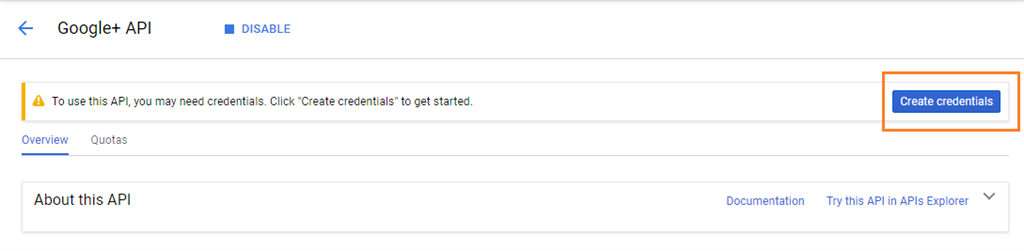
After selecting the Google+ API option, you will be redirected to a page as shown below, where you need to click on the Enable button.

After this the Google+ API will be enabled and you will be redirected to API home page. Click on Create credentials button on the right side of page to configure the secrets for your API.

You will see an “Add credentials to your project” form.

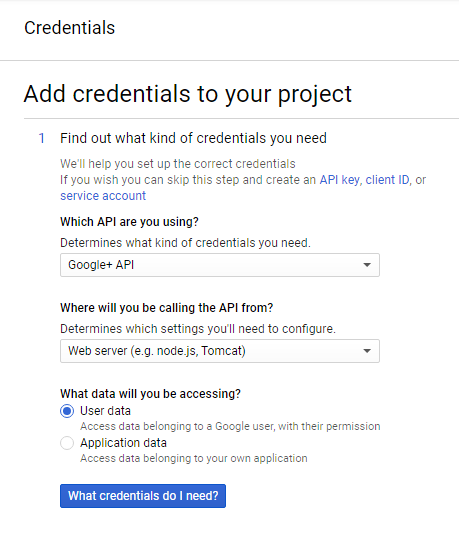
This form has three sections.
Fill in the details of the sections as mentioned below
Section 1 - Find out what kind of credentials you need
- Which API are you using? - Google+ API
- Where will you be calling the API from? - Web server (e.g. node.js, Tomcat)
- What data will you be accessing? - User data
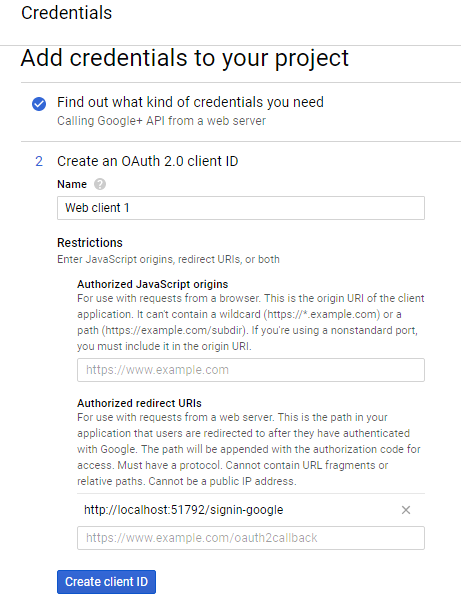

Section 2 - Create an OAuth 2.0 client ID
- Name – The default value provided by Google.
- Authorized JavaScript origins- Leave it blank.
- Authorized redirect URIs - Give the base URL of your application with /signin-google appended to it. For this tutorial the URL will be http://yourstore.com/signin-google. After entering the URL Press TAB to add the value.

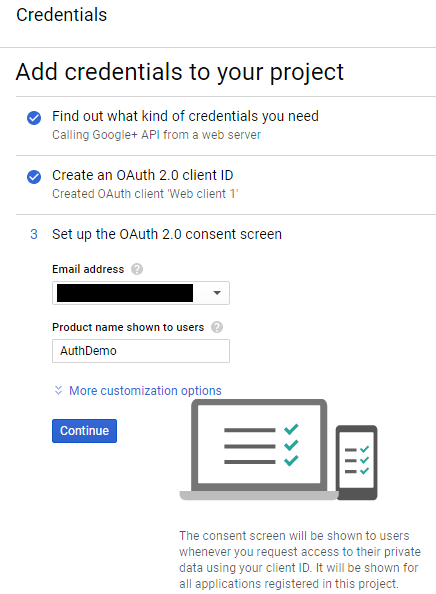
Section 3 - Set up the OAuth 2.0 consent screen
- Email address– Select your email address from the dropdown. This value is masked in the above image for privacy.
- Product name shown to users – Enter any product name. Here we are using “AuthDemo” as the Product name.
Do not use the word "Google" in your product name. You will be prompted with an error and you won't be allowed to create the app. This means "GoogleAuthDemo" is an invalid name.
Click on continue.
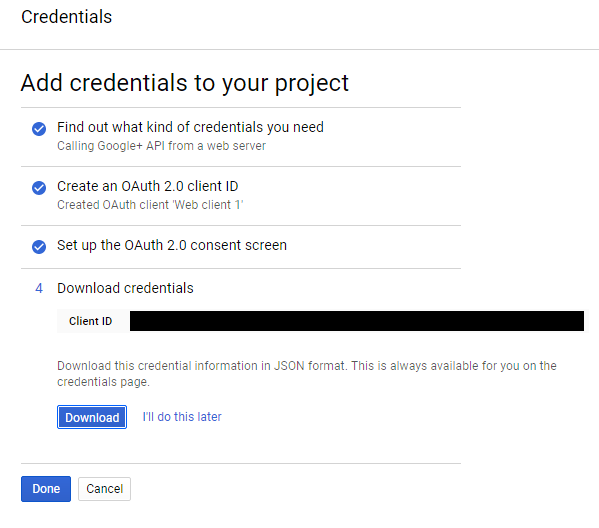

Open the just downloaded client_id.json file and make a note of ClientId and ClientSecret field. We will need these values to configure Google authentication in our web app.